In this post we’ll look at how to use C# with SQL. In this tutorial, we will discuss the process for creating a very simple C# console application that connects to a SQL Server database. You will learn the most basic steps needed to use C# with SQL. You will see how we can gather some basic information from the user and use it to run T-SQL commands behind the scenes to retrieve or update data in the database.
When it comes to SQL Server databases, I would say most of the time, your end users will NOT be running queries or updating data directly within SQL Server Management Studio. They will most likely be using a user-friendly software application that ultimately accesses the database and does the data retrieval or updating behind the scenes.
If you’re new to SQL, don’t forget to check out our article to Learn SQL Server.
We will discuss the following topics in this tutorial:
- Install Visual Studio 2019 Community and create an empty C# project
- Add the System.Data.SqlClient namespace to your C# project
- Setting up a SQL Server connection string
- Performing a SELECT statement from your C# program
- Doing an UPDATE statement in your C# program
- INSERT data from your C# with SQL program
- DELETE data from database from your C# program
- Final thoughts
Let’s do it:
Install Visual Studio 2019 Community and create an empty C# project
We will be using the latest-and-greatest free version of Microsoft Visual Studio to create our simple C# console application: Visual Studio 2019 Community.
In previous years, the free edition of Visual Studio has been called ‘Express‘. Recently, Microsoft decided to rename their free edition to ‘Community‘. So understand they are one-in-the-same.
Here is what the download page looks like:

Just click the Download Community 2019 link to start the download. This will download an .exe file starting with the name “vs_community“.
Installing Visual Studio Community 2019
Once that executable finishes downloading, double click on it to start the installation.
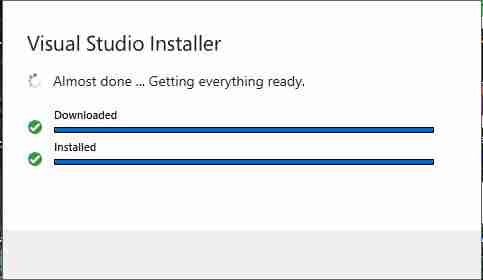
You’ll first see the Visual Studio Installer start up:
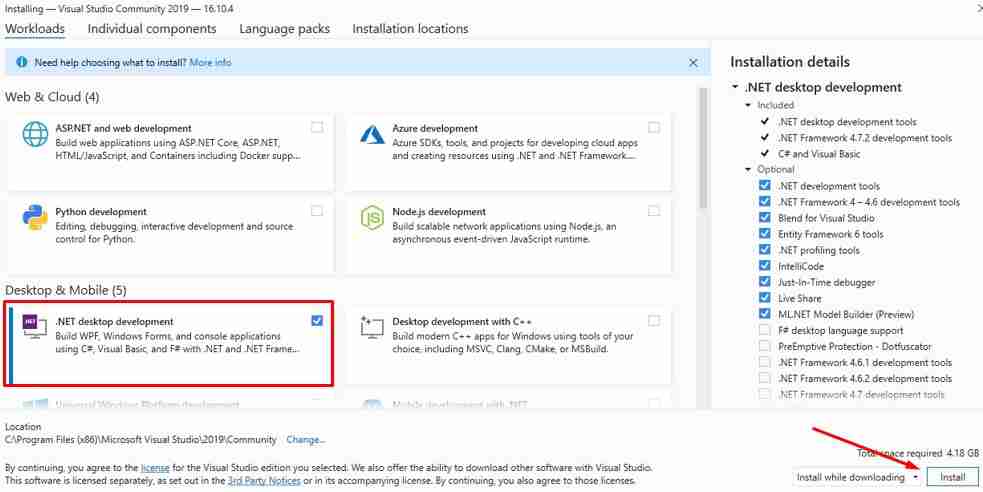
When it’s loaded, you’ll need to specify what “workload” you want to initially install with Visual Studio. You’ll pick .NET desktop development. The C# language , in case you didn’t know, is a .NET language:
Then, the installation process will begin!:
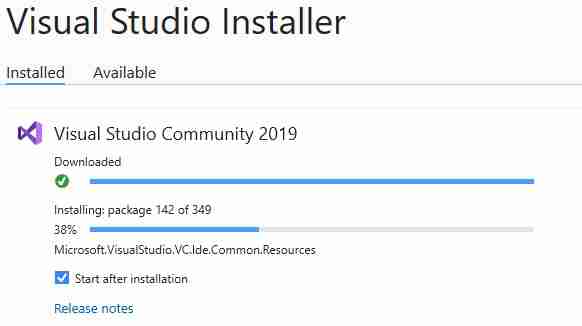
Notice the “Start after installation” checkbox is enabled. This will start Visual Studio Community automatically after the installation process is complete.
Setting up a C# project
Before we create our project, the first question we’re asked is the color theme we want Visual Studio to use. I like the regular Blue theme, but many people like the Dark theme. Pick the one you think you’ll like!:
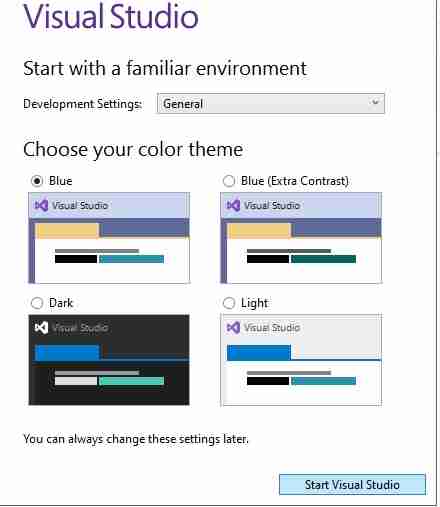
Then click Start Visual Studio.
You’ll be presented with a Get Started screen, where you’ll want to select Create a new project:
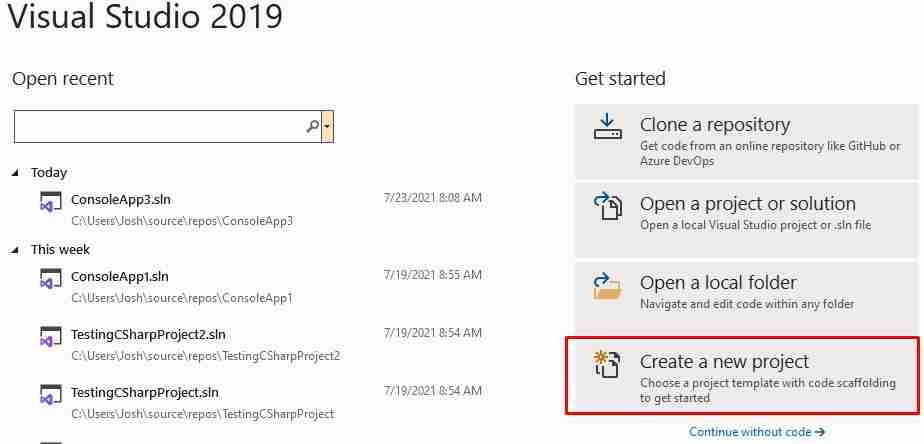
[picture 6]
On the “Create a new Project” screen, we’re going to pick the Console Application option that outlines the C# language, as shown here:
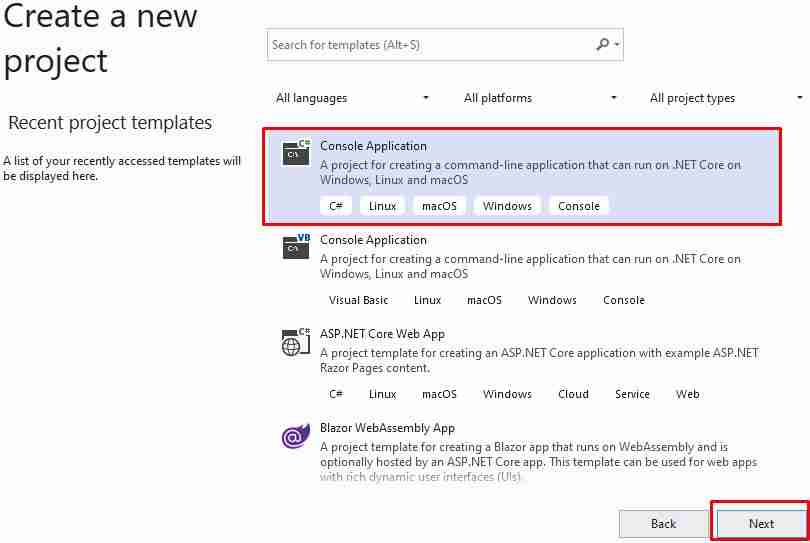
Then click Next.
We’re almost there. The next step is to name our C# project. Let’s call it SimpleSQLProject:
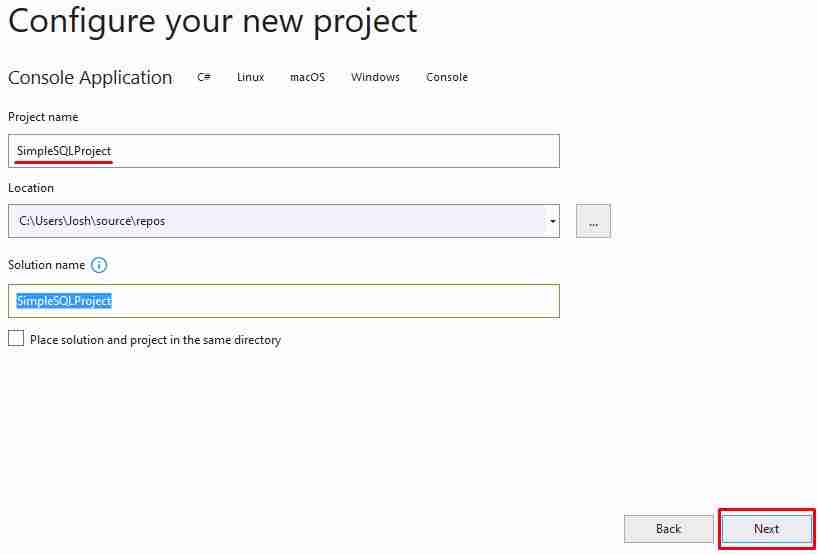
When you outline a Project Name, the Solution Name also updates. You can change it if you want to.
Also, the Location is given a default path. Again, you can change that if you want to. I’m just going to leave it alone.
Then, hit Next!
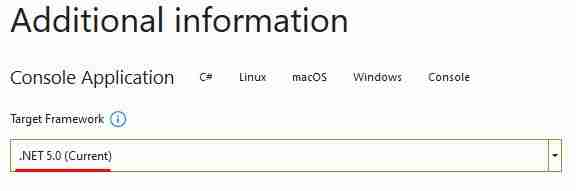
It will quickly ask you what version of .NET you want to use. Go ahead and pick .NET 5.0 if it’s available, then click Create.
That’s it! We have an empty project ready to use C# with SQL:
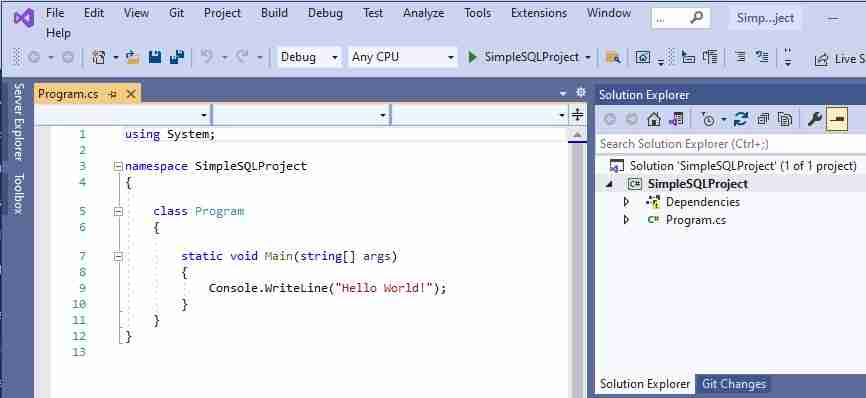
Gotta love the classic “Hello world” console message. These are every programmer’s first words spoken, you see.
Add the System.Data.SqlClient namespace to your C# project
As I subtly hinted at earlier, the key to linking a C# application to a SQL Server database is to use the System.Data.SqlClient namespace. This namespace contains all the classes and functions we need to make all our dreams come true.
Let’s add this namespace to our SimpleSQLProject project.
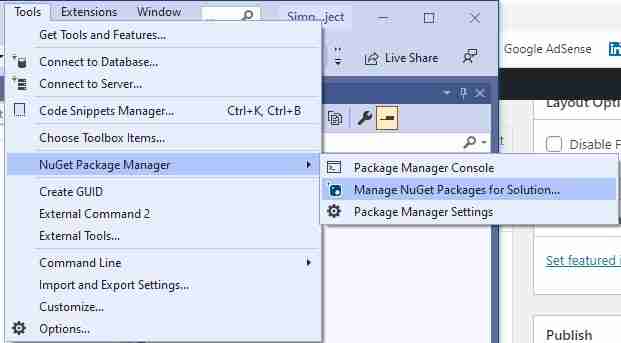
In Visual Studio, navigate to Tools -> NuGet Package Manager -> Manage NuGet Packages for Solution
This will open a new window where you can search for the System.Data.SqlClient namespace:
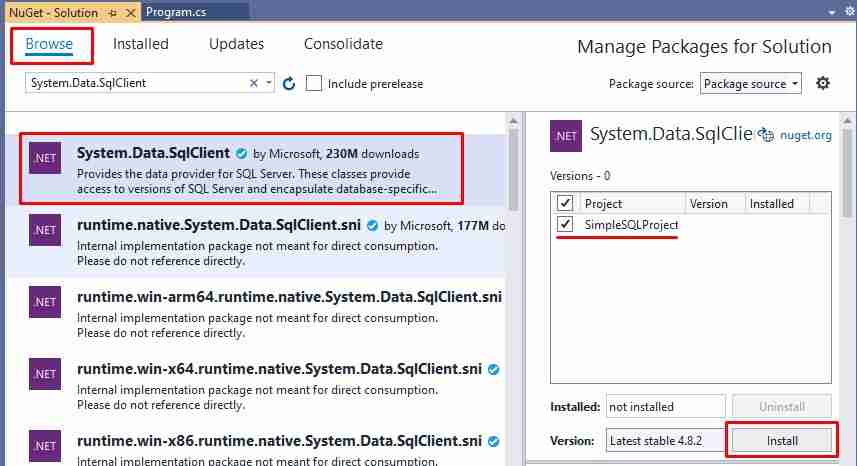
Here’s a rundown on what to do on this page:
- Make sure you are on the Browse tab, then type the name of the namespace we want, System.Data.SqlClient. It should appear as the first result.
- Enable the checkbox next to the project you want to add the namespace to (we only have one project, SimpleSQLProject).
- Click Install
Important! Don’t skip this step, or else you can use C# with SQL. The System.Data.SqlClient reference is crucial!
IF YOU DON’T GET ANY RESULTS WHEN SEARCHING FOR THE System.Data.SqlClient NAMESPACE:
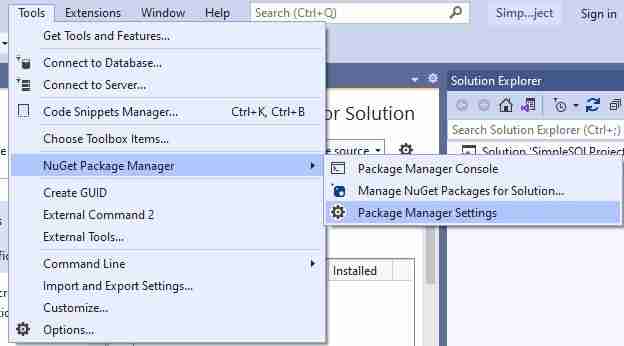
You might need to update the web location where the namespaces are searched. Navigate to Tools -> NuGet Package Manager -> Package Manager Settings:
In the “Options” window that appears, look in the Package Sources option. Make sure the Source field contains the following URL: https://api.nuget.org/v3/index.json

I encountered this issue and it nearly drove me crazy. Hopefully I just saved you a couple hours’ worth of Googling and frustration. You’re welcome.
We can double-check that our namespace is part of the project. Look at the properties of the project in the Solution Explorer, under Dependencies -> Packages:
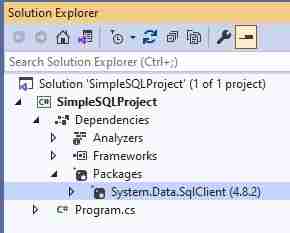
Excellent.
The “using” clause
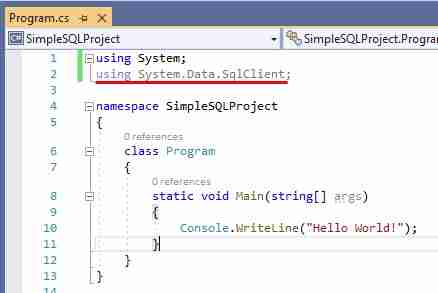
The last thing we need to do is outline a using clause in our source code. Here’s the syntax:
using System.Data.SqlClient;
A moment ago, we added the namespace to the project, but we didn’t actually say we wanted to use it yet. The using clause does just that:
We’re on our way.
Setting up a SQL Server connection string
To use C# with SQL, you’ll need to “connect” to the database. Our C# application needs to know the SQL Server connection details in order to work properly, obviously. Those details are outlined in something called a connection string.
The connection string contains details like:
- Name of the SQL Server
- Database name
- Login credentials
It contains everything the C# application needs to find and connect to the database.
So then the question becomes: How do I create a SQL Server connection string?
Creating a SQL Server connection string using a UDL file
We can create something called a UDL file to help us create the SQL Server connection string. Here are the simple steps:
- On the desktop (or any folder location, really) right click and choose New -> Text Document.
- The name of the document doesn’t matter, but you should change the extension of the document from .TXT to .UDL. You’ll get a prompt asking if you are sure. We are, in fact, sure.
- Right click the new .UDL file and select Open With -> OLE DB Core Services. This will open the following “Data Link Properties” window:
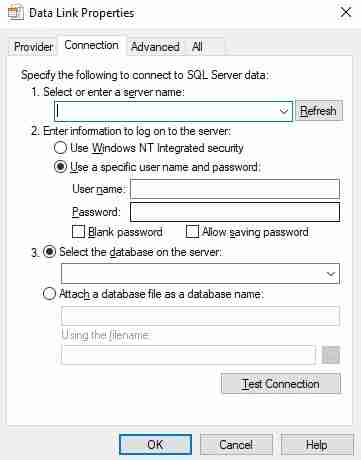
You’re going to fill out this form with the connection information for your SQL Server and database. Here is an example of the content of my UDL file:

My SQL Server is called “BEETLEJUICEPC\SQLEXPRESS01“, the name of the database is “Dealership“, and I’m choosing to connect to them using my Windows credentials. If you would rather connect to the SQL Server by outlining a username and password (maybe the SA account, for example), you can do that.
When you’ve outlined everything, click Test Connection to make sure it works!:
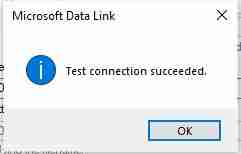
Once you’ve verified the connection is valid, click OK to close the UDL form.
Writing out the connection string to a file
Next, we can open the same UDL file within a text editor (like Notepad or Notepad++) and see the connection information there in plain text format.
Right click the UDL file and choose Open With -> Notepad. The document will open in Notepad and you will see your new connection string!:

Yours might look slightly different from mine, but you should see the name of your SQL Server and database. If you chose to login using a username and password, you would see that, too.
Awesome, so now we have the connection string.
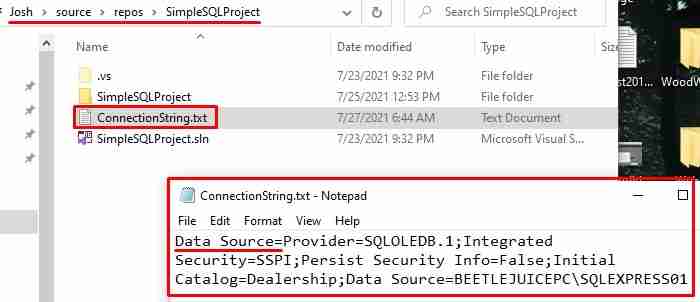
We should copy that string to it’s own file, then put that file in the same folder location as our project. It doesn’t need to be in that folder location, but that seems like the best place for it.
Remember earlier when we created the C# project, it outlined the default location where the project would be saved to. I’ll just put the new ConnectionString.txt file there.
(I need to emphasize that this ConnectionString.txt file doesn’t need to exist, but later we’ll see why it’s a really good idea to have it)
Important: When you copy the connection string to this ConnectionString.txt file, you need to add the words ‘Data Source =‘ to the front of it.
So the file will looks like this:
We’re on the home stretch.
Performing a SELECT statement from your C# program
Ok, let’s make a simple connection to the database.
But first, let’s actually create some data in our database. For our examples, we’re going to pretend we work at a used car dealership, and need a database to keep track of the vehicles in our inventory. We’re going to start with a table called Vehicles:
CREATE TABLE Vehicles
(
   CarID INT PRIMARY KEY IDENTITY,
   VIN VARCHAR(10),
   Make VARCHAR(15),
   Model VARCHAR(15),
   CarYear SMALLINT,
   Mileage INT
)
Notice the CarID column uses the IDENTITY property. This is useful for automatically populating the column with a new value on inserts.
Also notice the CarYear column is a SMALLINT data type. This data type can store a number as large as about 32,000, which is of course much more than we need, but it uses less space in memory than the INT data type, for example. You should always try to use the smallest data type to suit your needs.
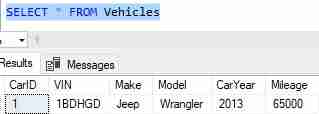
Let’s populate the table with a single row:
INSERT INTO Vehicles (VIN, Make, Model, CarYear, Mileage)
VALUES ('1BDHGD', 'Jeep', 'Wrangler', 2013, 65000)
Nice, here’s what the table ought to look like:
Writing a SELECT statement in the C# application
Ok, enough setup.
Let’s say our C# application is the tool our employees will use to gather details about cars in our inventory.
Let’s write a simple SELECT statement to return all the details of a vehicle with a specific CarID, provided by the user.
In SQL, we know that’s a simple line of code. Let’s say we want to see all the details of CarID = 1

But let’s see if we can mimic that in our C# with SQL application. Again, the difference is that the user will provide the CarID value of the vehicle for which they want details.
Back in the C# application, let’s write the line of code where we ask the user for their input (in the Main function):
Console.Write("Enter CarID to see it's details: ");
We read what the user typed with a simple Console.ReadLine(). But let’s take that input and actually use it as a parameter to a new function dedicated to the task of running a SQL SELECT statement. We’ll call our new C# function doSelectStatement. Here is the call to it:
Console.Write("Enter CarID to see it's details: ");
doSelectStatement(int.Parse(Console.ReadLine()));
If you are a programmer, you’ll understand the importance of functions. We want to isolate tasks into their own code blocks.
Using the SqlConnection, SqlCommand, and SqlDataReader classes
Ok, so now we need to write the doSelectStatement C# function. We’ll start slow:
private static void doSelectStatement(int CarID)
{
}
The first thing we need to put in this function a using block, which outlines a new SqlConnection object:
private static void doSelectStatement(int CarID)
{
   using (SqlConnection newConnection = new SqlConnection(*connection string *))
   {
   }
}
Notice the *connection string* part. We’re going to copy and paste our connection string here, in quotes:
private static void doSelectStatement(int CarID)
{
   using (SqlConnection newConnection =
          new SqlConnection("Data Source=Provider=SQLOLEDB.1;
                             Integrated Security=SSPI;Persist Security Info=False;
                             Initial Catalog=Dealership;
                             DataSource=BEETLEJUICEPC\\SQLEXPRESS01") )
   {
   }
}
Remember to put the ‘Data Source =‘ at the front of the connection string.
Notice if your SQL Server name contains a backslash (‘\‘), you need to escape it with a second backslash.
(Again, I might have saved you hours’ worth of Googling. You’re welcome.)
Ok, so the newConnection object is used to connect to the database. The next step is to create a SqlCommand object, passing our newConnection object to it:
private static void doSelectStatement(int CarID)
{
   using (SqlConnection newConnection = new SqlConnection("Data Source=Provider=SQLOLEDB.1;Integrated Security=SSPI;Persist Security Info=False;Initial Catalog=Dealership;Data Source=BEETLEJUICEPC\\SQLEXPRESS01"))
   {
      SqlCommand selectCommand = new SqlCommand("select VIN, Make, Model, CarYear, Mileage from Vehicles where CarID = " + CarID, newConnection);
      selectCommand.Connection.Open();
}
}
The first parameter to the SqlCommand constructor is the actual SQL statement we want to fire. It’s just a string value. Notice how we append the CarID value. The second parameter is the newConnection object we created in the using block.
Fairly straightforward.
Then, you see how we need to actually open the connection by saying selectCommand.Connection.Open()
(Later, we’ll make sure to close the connection by saying the following: selectCommand.Connection.Close())
The next thing we need to do is actually execute the SQL statement and read its results into a SqlDataReader object.
The way we execute our SQL statement is by calling the ExecuteReader() function on the selectCommand object. Here’s the code:
private static void doSelectStatement(int CarID)
{
   using (SqlConnection newConnection = new SqlConnection("Data Source=Provider=SQLOLEDB.1;Integrated Security=SSPI;Persist Security Info=False;Initial Catalog=Dealership;Data Source=BEETLEJUICEPC\\SQLEXPRESS01"))
   {
      SqlCommand selectCommand = new SqlCommand("select VIN, Make, Model, CarYear, Mileage from Vehicles where CarID = " + CarID, newConnection);
      selectCommand.Connection.Open();
      SqlDataReader sqlReader;
      try
      {
         sqlReader = selectCommand.ExecuteReader();
      }
      catch
      {
         Console.WriteLine("Error occurred while attempting SELECT.");
      }
      selectCommand.Connection.Close();
   }
}
Again, notice we need to write the result of that ExecuteReader() function to a SqlDataReader object, called sqlReader in our case.
It’s a good idea to perform this ExecuteReader() function in a try…catch block. You want to make sure any errors in your code are handled gracefully.
Printing the results of our query to the screen
Ok, so we successfully executed our SQL query, and we know its results are held in the sqlReader object. The next step is to just pull the information from that object.
Let’s just show you how it’s done, then we’ll discuss it:
private static void doSelectStatement(int CarID)
{
using (SqlConnection newConnection = new SqlConnection("Data Source=Provider=SQLOLEDB.1;Integrated Security=SSPI;Persist Security Info=False;Initial Catalog=Dealership;Data Source=BEETLEJUICEPC\\SQLEXPRESS01"))
       {
                SqlCommand selectCommand = new SqlCommand("select VIN, Make, Model, CarYear, Mileage from Vehicles where CarID = " + CarID, newConnection);
                selectCommand.Connection.Open();

                SqlDataReader sqlReader;
                try
                {
                    sqlReader = selectCommand.ExecuteReader();

                    if (sqlReader.Read())
                    {
                        Console.WriteLine("VIN of car is: {0}", sqlReader.GetString(0));
                        Console.WriteLine("Make of car is: {0}", sqlReader.GetString(1));
                        Console.WriteLine("Model of car is: {0}", sqlReader.GetString(2));
                        Console.WriteLine("Year of car is: {0}", sqlReader.GetInt16(3).ToString());
                        Console.WriteLine("Mileage of car is: {0}", sqlReader.GetInt32(4).ToString());
                    }
                }
                catch
                {
                    Console.WriteLine("Error occurred while attempting SELECT.");
                }
                selectCommand.Connection.Close();
            }
}
The first thing you should do is double-check your sqlReader object to make sure there is actually something to read. This is accomplished with the simple if (sqlReader.Read()) code. We want to make sure the query actually returned something.
It would be bad if we attempted to read information from the sqlReader object if it was empty.
So then we call several ‘Get‘ functions. These ‘Get‘ functions will read column data from the result set of our query. As a parameter to these ‘Get‘ functions, we pass a number representing the column we want to get data from. The result set columns start with an index of 0.
Which ‘Get‘ function we use depends on the data type of the column for which we need to read data.
The different ‘Get’ functions
If the column we need to read contains a string value, we use the GetString() function. If the column is an integer, we might need to use either GetInt16() or GetInt32() or even GetInt64()
Which ‘Get‘ function you use will depend on the data type of the SQL column you’re reading from.
For example, if we want the data from the first column in our result set, we need to use the GetString function since that is a string column. As a parameter to the function, we pass the number of the column we want to get data from. Since we want the first column, and column numbers start with an index of 0, the call would be GetString(0).
The CarYear of our vehicle is the fourth column in our SELECT statement. If columns start with an index of 0, this would mean the CarYear is column number 3. But to pull integer information, we need to use a ‘GetInt‘ method. Since the CarYear column is a SMALLINT data type, we use the ‘GetInt16‘ method. So the whole call is GetInt16(3).
(And also, we need everything to be in a string format for the Console.WriteLine method, so we actually need to call the ‘ToString‘ method on the whole thing to convert the integer result to a string: GetInt16(3).ToString())
Again folks, which ‘Get‘ function we use depends on the data type of the column for which we need to read data. Take a look at the official Microsoft documentation on the SqlDataReader class to understand more about the different ‘Get‘ methods.
Folks, we’ve done it. Here is everything we have so far:
static void Main(string[] args)
{
            Console.WriteLine("Hello World!");

            //Select Statement Example
            Console.WriteLine();
            Console.Write("Enter CarID to see it's details: ");
            doSelectStatement(int.Parse(Console.ReadLine()));
            Console.WriteLine();
}
private static void doSelectStatement(int CarID)
{
            using (SqlConnection newConnection = new SqlConnection("Data Source=Provider=SQLOLEDB.1;Integrated Security=SSPI;Persist Security Info=False;Initial Catalog=Dealership;Data Source=BEETLEJUICEPC\\SQLEXPRESS01"))
            {
                SqlCommand selectCommand = new SqlCommand("select VIN, Make, Model, CarYear, Mileage from Vehicles where CarID = " + CarID, newConnection);
                selectCommand.Connection.Open();

                SqlDataReader sqlReader;
                try
                {
                    sqlReader = selectCommand.ExecuteReader();

                    if (sqlReader.Read())
                    {
                        Console.WriteLine("VIN of car is: {0}", sqlReader.GetString(0));
                        Console.WriteLine("Make of car is: {0}", sqlReader.GetString(1));
                        Console.WriteLine("Model of car is: {0}", sqlReader.GetString(2));
                        Console.WriteLine("Year of car is: {0}", sqlReader.GetInt16(3).ToString());
                        Console.WriteLine("Mileage of car is: {0}", sqlReader.GetInt32(4).ToString());
                    }
                }
                catch
                {
                    Console.WriteLine("Error occurred while attempting SELECT.");
                }
                selectCommand.Connection.Close();
            }
}
All we need to do is build the solution and run it.
Building and running our C# with SQL code
To build the solution, just right-click the solution in the Solution Explorer in Visual Studio and choose Build Solution (or just hit Ctrl+Shift+B on your keyboard):

Then to run the application, just navigate to Debug -> Start Without Debugging (or just hit Ctrl+F5 on your keyboard):
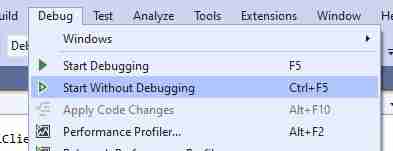
It will launch your console app:
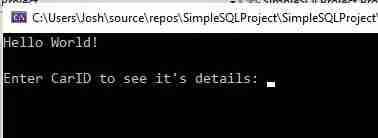
Remember, we want the user to enter the ID of the car they want details for. We only have one car in our Vehicles table, and it has a CarID of 1. So let’s enter 1 and see if our getSelectStatement function works:
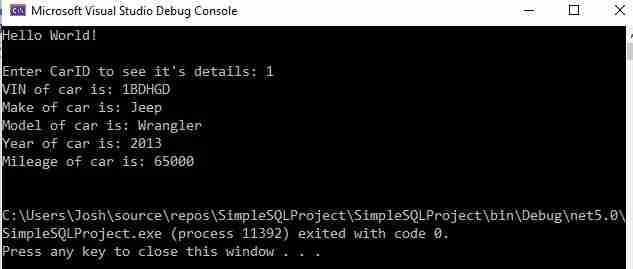
Yep, it checks out.
Reading the connection string from file
Let’s think about something we did in our source code that might be considered bad practice.
We basically hard-coded our connection string information in the C# code. If that seems a bit unsafe, that’s because it is. What if it needs to change? Sure, you can change it easily, but what about the end user? They won’t have access to the source code, nor would they really know what they’re doing if they did!
For that reason, it would be better to read in the connection string information from a file. Remember when we saved our connection string to a file called ConnectionString.txt? Well, we can read from that file in our source code. It would be best to also create a separate function dedicated to getting the connection string. We’ll call it getConnectionString.
To read from a file (using the FileStream class) we need to include the System.IO namespace to our application. That is as simple as adding another ‘using‘ clause to the top of our code:
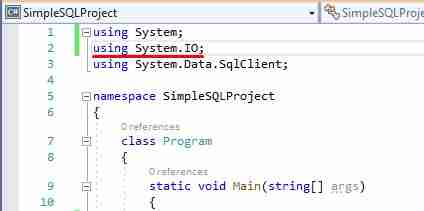
Once that is there, we can write the following getConnectionString function:
private static string getConnectionString()
{
            string ConnectionStringFileLocation = "C:\\Users\\Josh\\source\\repos\\SimpleSQLProject\\ConnectionString.txt";
            using FileStream fs = File.OpenRead(ConnectionStringFileLocation);
            using var sr = new StreamReader(fs);
            return sr.ReadLine();
}
Again, notice the double backslashes in the folder path.
This function returns the string value of the connection string outlined in the ConnectionString.txt file. So now, instead of hard-coding the connection string, we can just call our new getConnectionString() function to retrieve the connection string for us:
private static void doSelectStatement(int CarID)
{
            using (SqlConnection newConnection = new SqlConnection(getConnectionString()))
            {
                SqlCommand selectCommand = new SqlCommand("select VIN, Make, Model, CarYear, Mileage from Vehicles where CarID = " + CarID, newConnection);
                selectCommand.Connection.Open();

                SqlDataReader sqlReader;
                try
                {
                    sqlReader = selectCommand.ExecuteReader();

                    if (sqlReader.Read())
                    {
                        Console.WriteLine("VIN of car is: {0}", sqlReader.GetString(0));
                        Console.WriteLine("Make of car is: {0}", sqlReader.GetString(1));
                        Console.WriteLine("Model of car is: {0}", sqlReader.GetString(2));
                        Console.WriteLine("Year of car is: {0}", sqlReader.GetInt16(3).ToString());
                        Console.WriteLine("Mileage of car is: {0}", sqlReader.GetInt32(4).ToString());
                    }
                }
                catch
                {
                    Console.WriteLine("Error occurred while attempting SELECT.");
                }
                selectCommand.Connection.Close();
            }
}
Much cleaner. And now, if we need to change the name of the SQL Server or the database, we can change it in the ConnectionString.txt file!
Doing an UPDATE statement in your C# program
Folks, the rest of this tutorial is going to be slight variations of what you have already learned. The process for running other SQL statements (like UPDATE, INSERT or DELETE) is very similar to running a SELECT statement using C# with SQL.
Let’s think about an UPDATE statement. For this example, let’s have the user actually type out what UPDATE statement they want executed in SQL.
Here’s a new block in the Main function of our code:
//Update Statement Example
Console.WriteLine();
Console.Write("Enter UPDATE statement: ");
doUpdateStatement(Console.ReadLine());
Console.WriteLine();
Notice the doUpdateStatement call. We need to write that function. As a parameter, we simply pass the string typed by the user. Here's the doUpdateStatement function:
private static void doUpdateStatement(string updateStatement)
{
            using (SqlConnection updateConnection = new SqlConnection(
            getConnectionString()))
            {
                SqlCommand updateCommand = new SqlCommand(updateStatement, updateConnection);
                updateCommand.Connection.Open();

                try
                {
                    if (updateCommand.ExecuteNonQuery() > 0)
                        Console.WriteLine("Update successful");
                    else
                        Console.WriteLine("No rows updated!");
                }
                catch
                {
                    Console.WriteLine("Error occurred while attempting UPDATE.");
                }
                updateCommand.Connection.Close();
            }
}
Let’s talk about how this function is the same as our previous function:
- We created a using block that outlines a SqlConnection object called updateConnection. And again, we called our handy getConnectionString() function to grab the connection string from our file.
- We create a SqlCommand object called updateCommand. In the constructor, we pass the SQL statement we want to run and the connection object. In this case, the SQL statement is what the user typed out (stored in the updateStatement parameter). Then we open the connection saying updateCommand.Connection.Open().
- Then we execute the query using ExecuteNonQuery().
That last point is worth talking about. The statement we’re running isn’t exactly a query, is it? We’re not extracting information when we do an UPDATE statement.
I suppose that’s why Microsoft decided to name the method ExecuteNonQuery. If we are, in fact, querying data, we use ExecuteReader like we saw when running the SELECT statement earlier.
The other thing about ExecuteNonQuery is that it returns the number of rows effected by the SQL statement. So if our query did successfully update one row, the return value from ExecuteNonQuery would be 1. This is why it’s a good idea to put the call to ExecuteNonQuery in an ‘if‘ statement. If the command updated at least one row, we know it worked.
One final thing to note is how we don’t have a SqlDataReader object. Remember, we’re not reading anything, right?
Testing an UPDATE statement from our C# application
Let’s test it out. Remember to build the solution before running the program.
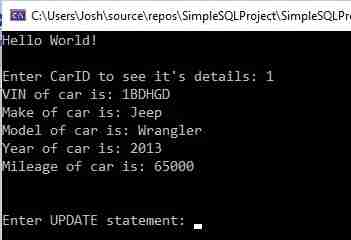
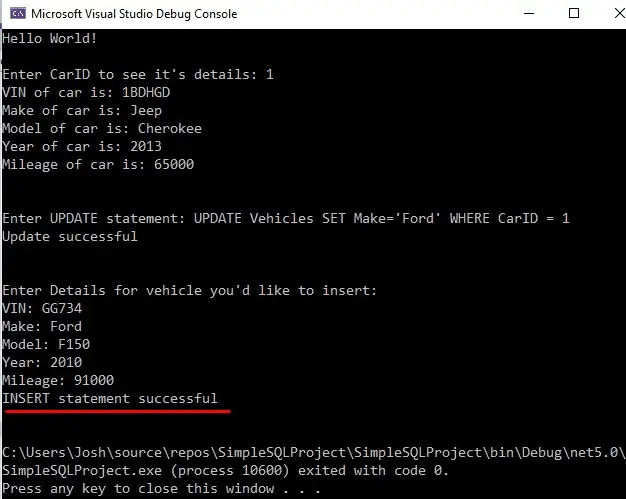
After the SELECT statement work is done, we’re asked to type the UPDATE statement we want executed:
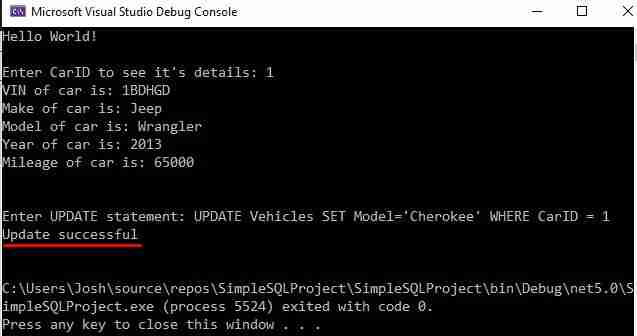
So, let’s type an UPDATE statement. For example: UPDATE Vehicles SET Model=’Cherokee’ WHERE CarID = 1
Here is that UPDATE statement ran from our program:
Now if we check the data in SQL, we see it did, in fact, change:
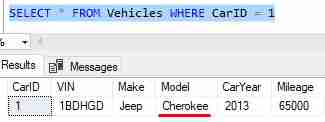
Nice.
INSERT data from your C# with SQL program
Again folks, we’re basically going to do similar work for INSERT statement. This time, we’ll ask the user to enter the information they would like inserted into the Vehicles table.
Here is the new block in our Main function:
//Insert Statement Example
Console.WriteLine();
Console.WriteLine("Enter Details for vehicle you'd like to insert:");
Console.Write("VIN: ");
string newCarVIN = Console.ReadLine();

Console.Write("Make: ");
string newCarMake = Console.ReadLine();

Console.Write("Model: ");
string newCarModel = Console.ReadLine();

Console.Write("Year: ");
int newCarYear = int.Parse(Console.ReadLine());

Console.Write("Mileage: ");
int newCarMileage = int.Parse(Console.ReadLine());

doInsertStatement(newCarVIN, newCarMake, newCarModel, newCarYear, newCarMileage);
Console.WriteLine();
We’re asking the user for everything:
- VIN
- Make
- Model
- Year
- Mileage
We are going to pass all that information to the new doInsertStatement function. Speaking of:
private static void doInsertStatement(string VIN, string Make, string Model, int Year, int Mileage)
{
            using (SqlConnection insertConnection = new SqlConnection(
            getConnectionString()))
            {
                string insertStatement = "INSERT INTO Vehicles (VIN, Make, Model, CarYear, Mileage) VALUES " +
                "('" + VIN + "','" + Make + "','" + Model + "'," + Year + "," + Mileage + ")";
                SqlCommand insertCommand = new SqlCommand(insertStatement, insertConnection);
                insertCommand.Connection.Open();
                try
                {
                    if (insertCommand.ExecuteNonQuery() > 0)
                        Console.WriteLine("INSERT statement successful");
                    else
                        Console.WriteLine("Insert statement FAILED!");
                }
                catch
                {
                    Console.WriteLine("Error occurred while attempting INSERT.");
                }
                insertCommand.Connection.Close();
            }
}
Again folks, it’s more of the same:
- Get a connection using SqlConnection and our handy getConnectionString function.
- Create a new SqlCommand object that passes the SQL statement we want to run as a parameter
- Call ExecuteNonQuery, which returns the number of rows effected. If the INSERT statement succeeded, that means one row was effected.
Let’s test it out:
Now let’s check the data:

Awesome.
DELETE data from database from your C# program
You get the idea. More of the same.
Let’s have the user enter the CarID of the car they want to delete. Here’s the new code in the Main function:
//Delete Statement Example
Console.WriteLine();
Console.Write("Enter CarID for the car you'd like to delete: ");
doDeleteStatement(int.Parse(Console.ReadLine()));
Console.WriteLine();
Here’s the new doDeleteStatement function:
private static void doDeleteStatement(int CarID)
private static void doDeleteStatement(int CarID)
{
            using (SqlConnection deleteConnection = new SqlConnection(
            getConnectionString()))
            {
                SqlCommand deleteCommand = new SqlCommand("DELETE from Vehicles WHERE CarID = " + CarID, deleteConnection);
                deleteCommand.Connection.Open();
                try
                {
                    if (deleteCommand.ExecuteNonQuery() > 0)
                        Console.WriteLine("DELETE statement successful");
                    else
                        Console.WriteLine("DELETE statement FAILED!");
                }
                catch
                {
                    Console.WriteLine("Error occurred while attempting DELETE.");
                }
                deleteCommand.Connection.Close();
            }
}
We already know the drill:
- Get a connection using getConnectionString
- Create SqlCommand object
- Call ExecuteNonQuery
Let’s test it out:
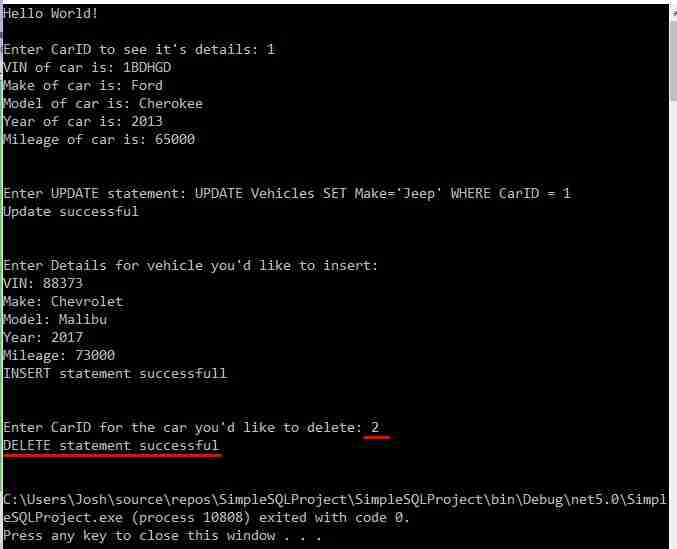
Let’s check the data. We ought to see that CarID # 2 is gone, which is the Ford F150 we added earlier:
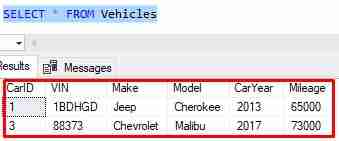
Yep, it’s gone!
Final thoughts
I hope this tutorial helped you understand how to use C# with SQL by successfully connecting a SQL Server database to a C# application.
We’ve learned how to both read and write data to a database via a C# application. It’s all possible through the use of the System.Data.SqlClient namespace.
Your next steps should be to play around with this program. Write your own functions, add more error handling, think about how to reduce repeated code, make it more user friendly, etc. The changes you could make to this code are endless.
Also, take a look at the documentation for the System.Data.SqlClient class. There is a lot of great information for you to read through.
For your ultimate convenience, here is the entire C# code:
using System;
using System.IO;
using System.Data.SqlClient;

namespace SimpleSQLProject
{
    class Program
    {
        static void Main(string[] args)
        {
            Console.WriteLine("Hello World!");

            //Select Statement Example
            Console.WriteLine();
            Console.Write("Enter CarID to see it's details: ");
            doSelectStatement(int.Parse(Console.ReadLine()));
            Console.WriteLine();

            //Update Statement Example
            Console.WriteLine();
            Console.Write("Enter UPDATE statement: ");
            doUpdateStatement(Console.ReadLine());
            Console.WriteLine();

            //Insert Statement Example
            Console.WriteLine();
            Console.WriteLine("Enter Details for vehicle you'd like to insert:");
            Console.Write("VIN: ");
            string newCarVIN = Console.ReadLine();

            Console.Write("Make: ");
            string newCarMake = Console.ReadLine();

            Console.Write("Model: ");
            string newCarModel = Console.ReadLine();

            Console.Write("Year: ");
            int newCarYear = int.Parse(Console.ReadLine());

            Console.Write("Mileage: ");
            int newCarMileage = int.Parse(Console.ReadLine());

            doInsertStatement(newCarVIN, newCarMake, newCarModel, newCarYear, newCarMileage);
            Console.WriteLine();

            //Delete Statement Example
            Console.WriteLine();
            Console.Write("Enter CarID for the car you'd like to delete: ");
            doDeleteStatement(int.Parse(Console.ReadLine()));
            Console.WriteLine();
        }
        private static string getConnectionString()
        {
            string ConnectionStringFileLocation = "C:\\Users\\Josh\\source\\repos\\SimpleSQLProject\\ConnectionString.txt";
            using FileStream fs = File.OpenRead(ConnectionStringFileLocation);
            using var sr = new StreamReader(fs);
            return sr.ReadLine();
        }

        private static void doSelectStatement(int CarID)
        {
            using (SqlConnection newConnection = new SqlConnection(getConnectionString()))
            {
                SqlCommand selectCommand = new SqlCommand("select VIN, Make, Model, CarYear, Mileage from Vehicles where CarID = " + CarID, newConnection);
                selectCommand.Connection.Open();

                SqlDataReader sqlReader;

                try
                {
                    sqlReader = selectCommand.ExecuteReader();
                    if (sqlReader.Read())
                    {
                        Console.WriteLine("VIN of car is: {0}", sqlReader.GetString(0));
                        Console.WriteLine("Make of car is: {0}", sqlReader.GetString(1));
                        Console.WriteLine("Model of car is: {0}", sqlReader.GetString(2));
                        Console.WriteLine("Year of car is: {0}", sqlReader.GetInt16(3).ToString());
                        Console.WriteLine("Mileage of car is: {0}", sqlReader.GetInt32(4).ToString());
                    }
                }
                catch
                {
                    Console.WriteLine("Error occurred while attempting SELECT.");
                }
                selectCommand.Connection.Close();
            }
        }

        private static void doUpdateStatement(string updateStatement)
        {
            using (SqlConnection updateConnection = new SqlConnection(
            getConnectionString()))
            {
                SqlCommand updateCommand = new SqlCommand(updateStatement, updateConnection);
                updateCommand.Connection.Open();

                try
                {
                    if (updateCommand.ExecuteNonQuery() > 0)
                        Console.WriteLine("Update successful");
                    else
                        Console.WriteLine("No rows updated!");
                }
                catch
                {
                    Console.WriteLine("Error occurred while attempting UPDATE.");
                }
                updateCommand.Connection.Close();
            }
        }

        private static void doInsertStatement(string VIN, string Make, string Model, int Year, int Mileage)
        {
            using (SqlConnection insertConnection = new SqlConnection(
            getConnectionString()))
            {
                string insertStatement = "INSERT INTO Vehicles (VIN, Make, Model, CarYear, Mileage) VALUES " +
                "('" + VIN + "','" + Make + "','" + Model + "'," + Year + "," + Mileage + ")";
                SqlCommand insertCommand = new SqlCommand(insertStatement, insertConnection);
                insertCommand.Connection.Open();

                try
                {
                    if (insertCommand.ExecuteNonQuery() > 0)
                        Console.WriteLine("INSERT statement successful");
                    else
                        Console.WriteLine("Insert statement FAILED!");
                }
                catch
                {
                    Console.WriteLine("Error occurred while attempting INSERT.");
                }
                insertCommand.Connection.Close();
            }
        }

        private static void doDeleteStatement(int CarID)
        {
            using (SqlConnection deleteConnection = new SqlConnection(
            getConnectionString()))
            {
                SqlCommand deleteCommand = new SqlCommand("DELETE from Vehicles WHERE CarID = " + CarID, deleteConnection);
                deleteCommand.Connection.Open();

                try
                {
                    if (deleteCommand.ExecuteNonQuery() > 0)
                        Console.WriteLine("DELETE statement successful");
                    else
                        Console.WriteLine("DELETE statement FAILED!");
                }
                catch
                {
                    Console.WriteLine("Error occurred while attempting DELETE.");
                }
                deleteCommand.Connection.Close();
            }
        }
    }
}
Want to learn more? Check out these related articles:
In addition, don’t forget to head on over to www.SimpleSQLTutorials.com where you’ll find more good stuff.


Leave a Reply